Hey Ya'll
As promised I am starting a thread about how I have repaired the return spring for the interior door release handle on 230sl's and the early 250sl's, the ones with the round indent.
(from another thread)
quote:
"Do you know what I need to do to get my interior door opening handle to spring back to the 'parked' position once I've used it to open the door? Once I pull on it to get out of the car, it sort of stays out in the 'semi-open relaxed' position rather than springing smartly back into place. I intend to take off the door panel and look but is there a replacement spring I can order in the interim, or something? Any advice gratefully rec'd.
James"
I discovered many years ago that when the inside release handle doesn't return after opening the door it's usualy caused by a broken torsional coil spring that is riveted inside the latch assembly.
Because replacing the door latch and jamb striker (they need to be replaced as a set) has always been expensive, I just pushed the handle back each time I opened my door for these past 31 years.
Last fall when I reinstalled my left door I took the time and came up with a repair for the latch that worked out quite well and didn't require drilling out the rivet that holds the assembly together.
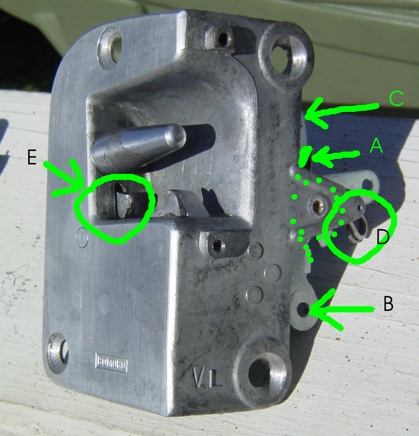
Left side door latch
A. Location of the broken spring (dotted line). It is sandwitched between levers B.&C. and held in place by the rivet they pivot on.
B. Door release lever the controll rod attaches to.
C. Lock lever controll rod attaches here.
D. Toggle spring for locking mechanism.
E. Lock out lever. This button needs to be pushed in to allow the lock lever to move to the locked position.
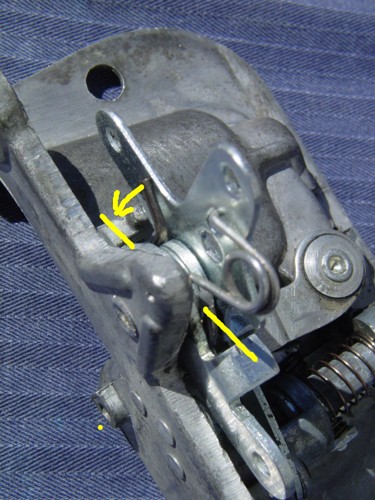
Half of the spring is missing on this latch. The remaining end is visible next to arrow and when the spring is in place its ends rest where the yellow lines indicate.

The first step in replacing the spring is to remove the toggle spring(D.) Then lift the end of spring (A.) up over the locking lever (C.) then wind it out similar to how you would remove a key from a key-ring.

The spring on the left is from a left door latch, the right from a right side latch. The left one spirals to the left, the right to the right (the same as screw threads) I don't think which way the replacement spring is wound will make a great deal of difference in how it works though.

The broken coil measures 20mm O.D. I found a coil tension spring at the hardware store that is a little bigger than 3/4" and has a slightly smaller wire guage. When I put the 2 broken spring pieces back together it made a loop of 450deg. (360+90 more)
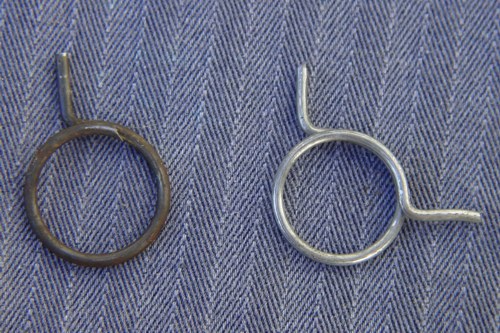
Cut off a section from the new coil spring and fashion it to match the old one, then wind it back in over the locking lever, opposite of how the old spring was removed.

When the new spring is in place between the levers, locate one end in the notch in the aluminum housing, then (this is the hard part) pull the other end with a pair of long nose pliars around and up between the gap where the release lever contacts the lock lever. The tab on the end of the spring may have to be bent slightly upward to get it through. After the spring is resting on the tab of the release lever it can be bent back down to where it lays flat and clear of the locking lever.
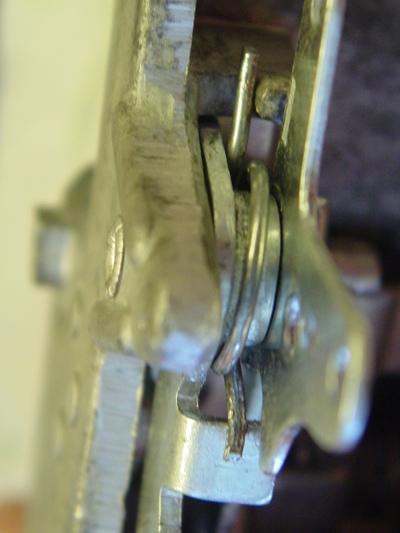
New spring in place viewed from front
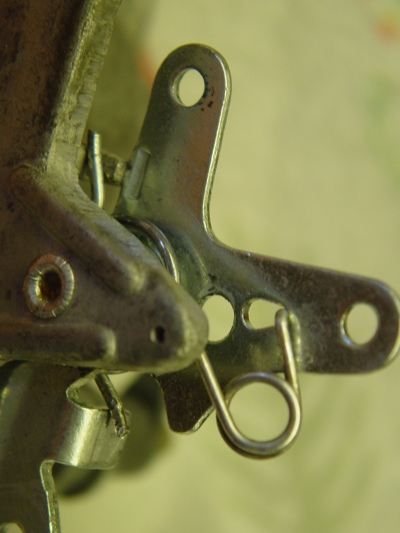
Once the new spring is in place, reinstall the toggle spring to the lock lever, check the lock and latch for proper operation and reinstall the latch back in the door.
It took me a little over an hour to do this the first time, but to reproduce the results on a different latch, take the pics and type this up has taken up nearly 6. I think whoever said "Easier said than done" had no idea what he was talking about.
I hope this helps someone out.

66 230sl
113-042-10-014715
904/396 blue, Ivory Tex
condition: not-as-rusty-as-before-bucket